What Kind of Stencils Are Used for Spray Paint Art

How to Stencil Similar a Pro: A Beginner's Guide
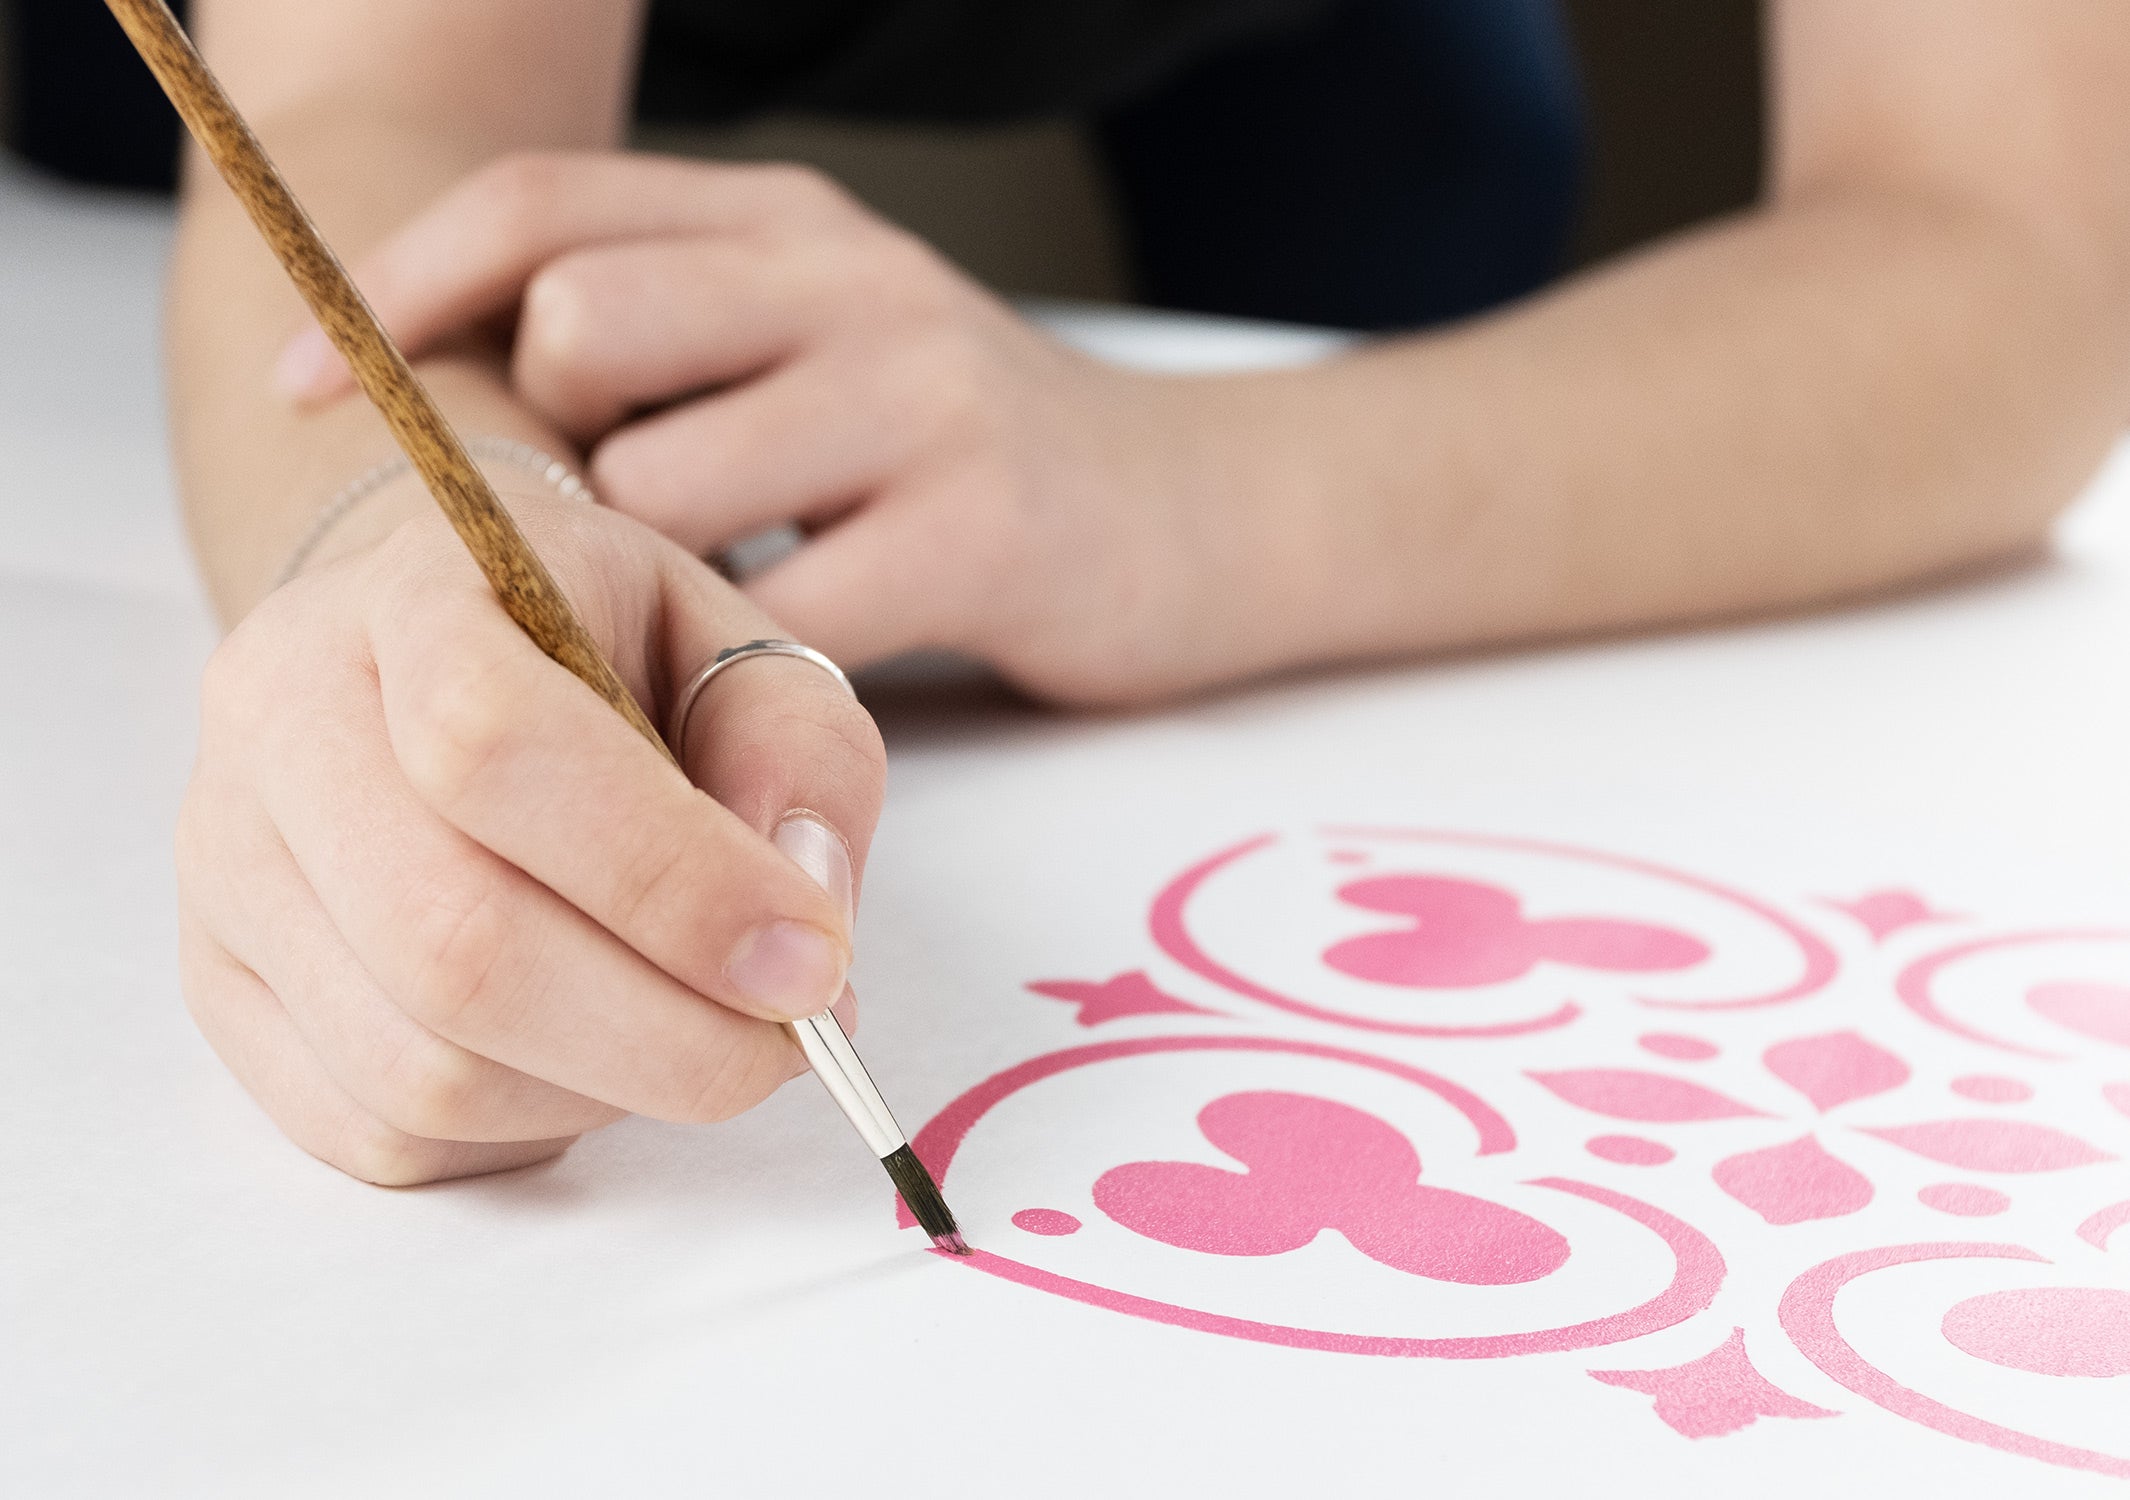
Learning how to stencil is a fabulous way to bring out your inner-artists and create a unique handcrafted finish on any surface: walls, floors, article of furniture, wood, metal, paper, fabric.
Stencilling is easy as information technology is fun and inspires a feeling of creative satisfaction. Pieces made by manus have a certain charm and a vibe that is undeniable; a quality that store-bought art cannot compete with. Not to mention, stencils are economical. You can reuse a quality mylar stencils many times with simple care and proper storage. Whipping upwardly a blueprint that looks amazing for a fraction of the cost is simply a dab (or coil) of paint away.
Ane give-and-take of communication : embrace your inner-artist but permit go of your inner-critic. Seriously. The magic of stencilling is the hand-painted finish. There will be tiny imperfections. Await it and let it go. Our eyes will see motifs and design non past individual flaw.
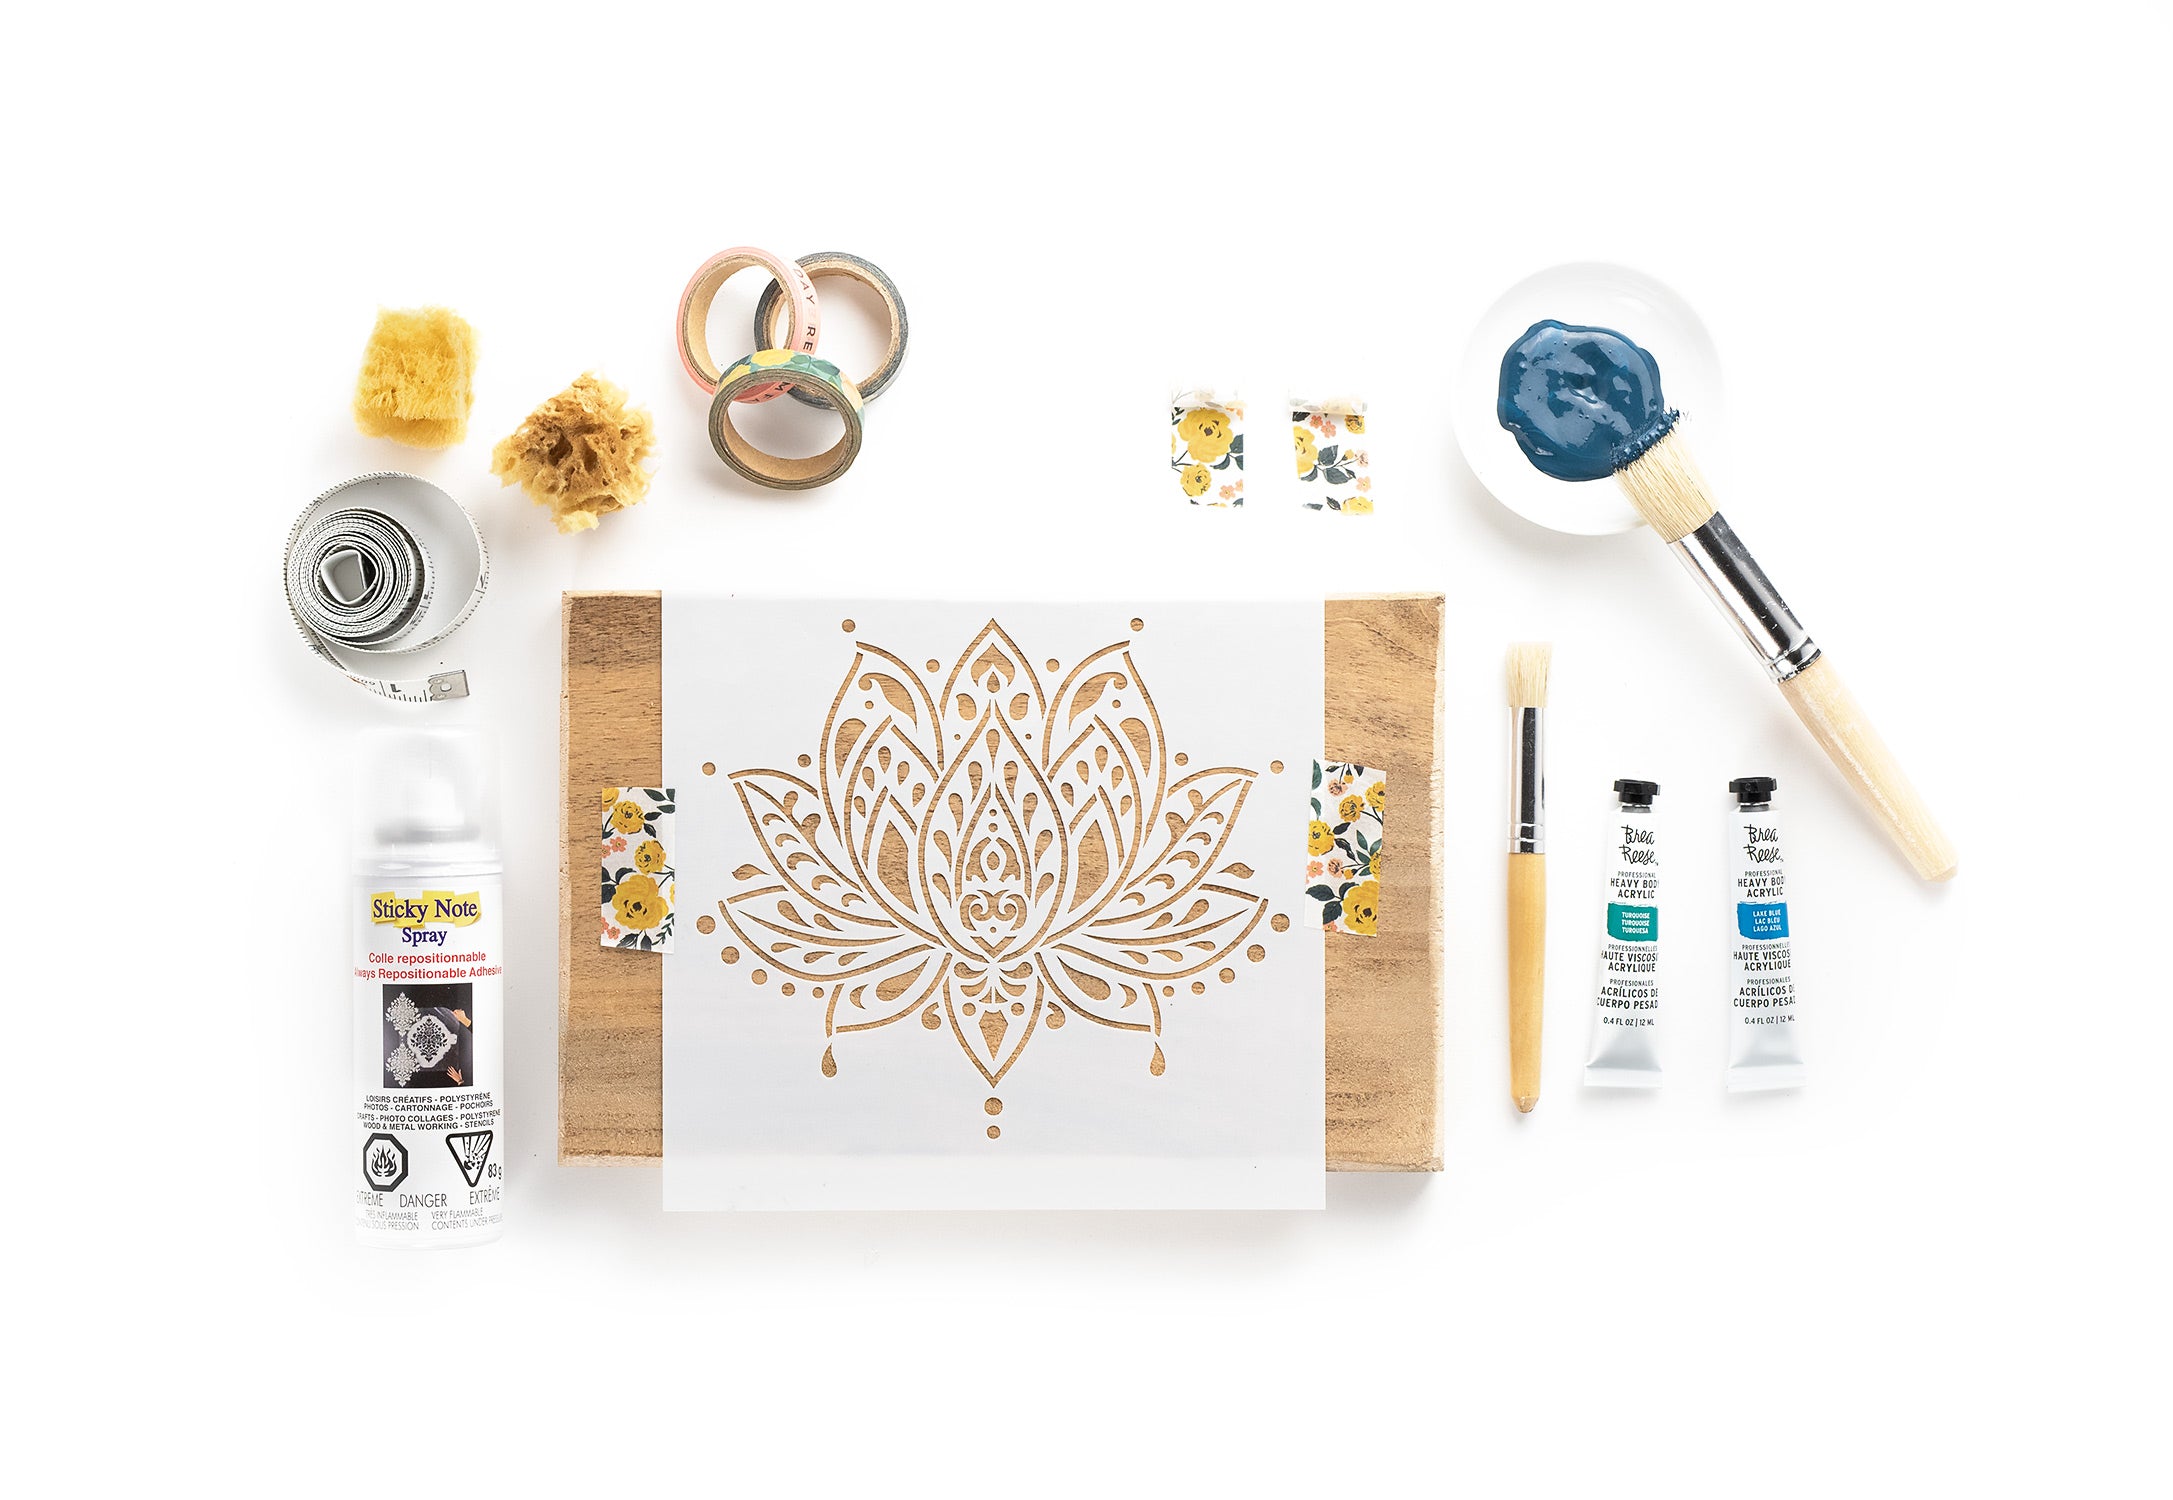
Tools + supplies
- Awarding tool: castor, dabber, sponge, or roller.
- Adhesive: Painter's tape or Spray Agglutinative.
- Paint: Acrylic ( matte), chalk paint, stencil creme.
- Pigment Tray: to agree paint or blend and create custom colors.
- Paper towel or Rags: To offload the paint before stencilling.
- Ruler/Record measure: Measure out and align the artwork.
- Stabilizer ( optional): Dowel, Pencil, or any stick-like tool.
Texture is important
You tin stencil on almost anything, merely not everything, like crude or heavily textured surfaces. Considering the stencil cannot lay flat on a textured surface, the paint will bleed underneath areas that practice not contact the surface.
Be sure to sand downwardly rough textured woods, or scrape and sand any loose or cracked paint earlier yous brainstorm. The smoother, the better.
Prep the surface before you start
Every time, every project!
By non preparing the surface beforehand, y'all run the run a risk of a failed projection. Stencilling over an unprepared surface ( dirt, dust, oil, one-time pigment) it is like building a house on a sand hill. All that work will slide or skin off.
Removing loose paint, dirt, or oil with a quick wipe down with a cleaning solution will aid the pigment stick to the surface — no need to buy fancy shop-bought cleaner. A mild soap and water wipe is all you need for most hard surfaces. If you need a deeper clean, nosotros've included two not-toxic recipes using ingredients nigh households take on hand.
Simple Cleaning Solution
- 1 cup of water
- 1 cup vinegar
Mix water and vinegar, that'south it! These are simple mixtures you can use to wipe downwardly walls, piece of furniture, floors without having to rinse. Wipe and go.
Deep Cleaning Solution
- 1 cup of h2o
- ½ cup of vinegar
- ane-2 tsp Borax
Woods: Apply medium-fine grit sandpaper to smooth and create a skilful base. Wash with cleaning solution and let dry.
Metal: Launder with a cleaning solution and allow dry out. For a metallic with rust, give it a good scrub with vinegar and baking soda to remove whatsoever loose bits. Wash with cleaning solution and let dry out.
Walls + Piece of furniture: Remove loose or cracked pigment past lightly scraping or sanding the surface. Wash with cleaning solution and let dry.
** Sanding volition take the terminate off previously painted surface. These are splendid steps to take before priming and painting.
Fabric: Wash and dry material. Skip the textile softener considering it creates a barrier between the material and paint.
Glass/Ceramics: Launder with a cleaning solution and let dry out.
How to stencil without bleed
Learning how to stencil without drain is the key to a crisp border. Don't go slapping the paint around willy-nilly. There are a few tips and tricks to get successful results each time.
Set up?
Tip 1: Stabilize the stencil
Use painter'southward tape or spray adhesive to secure the stencil to the surface, so it doesn't move.
Spray adhesive volition guarantee security that the stencil won't move, or the brush won't catch the edge and result in pigment bleed underneath. Lightly spray agglutinative to the back of the stencil and position on the surface.
Remove whatever residue from spray adhesive with a damp paper towel, or using one of the cleaning solutions used to prep the surface. Existence 100% honest, removing all the spray adhesive is hard. In that location volition be some of the spray adhesive that volition be left behind. It won't ruin the stencil. Later on you lot clean the stencil, place information technology on a piece of wax or parchment newspaper before storing the stencil. These steps hold true regardless if you're learning how to stencil on wood or any other surface. Keeping a clean stencil is crucial if yous want it to have a long life.
When using painter'south record, make sure you tape all sides, including corners ( if you can). A dowel or a pencil end is handy to agree the stencil downward in the expanse you are painting considering it prevents the stencil from lifting while you lot pigment.
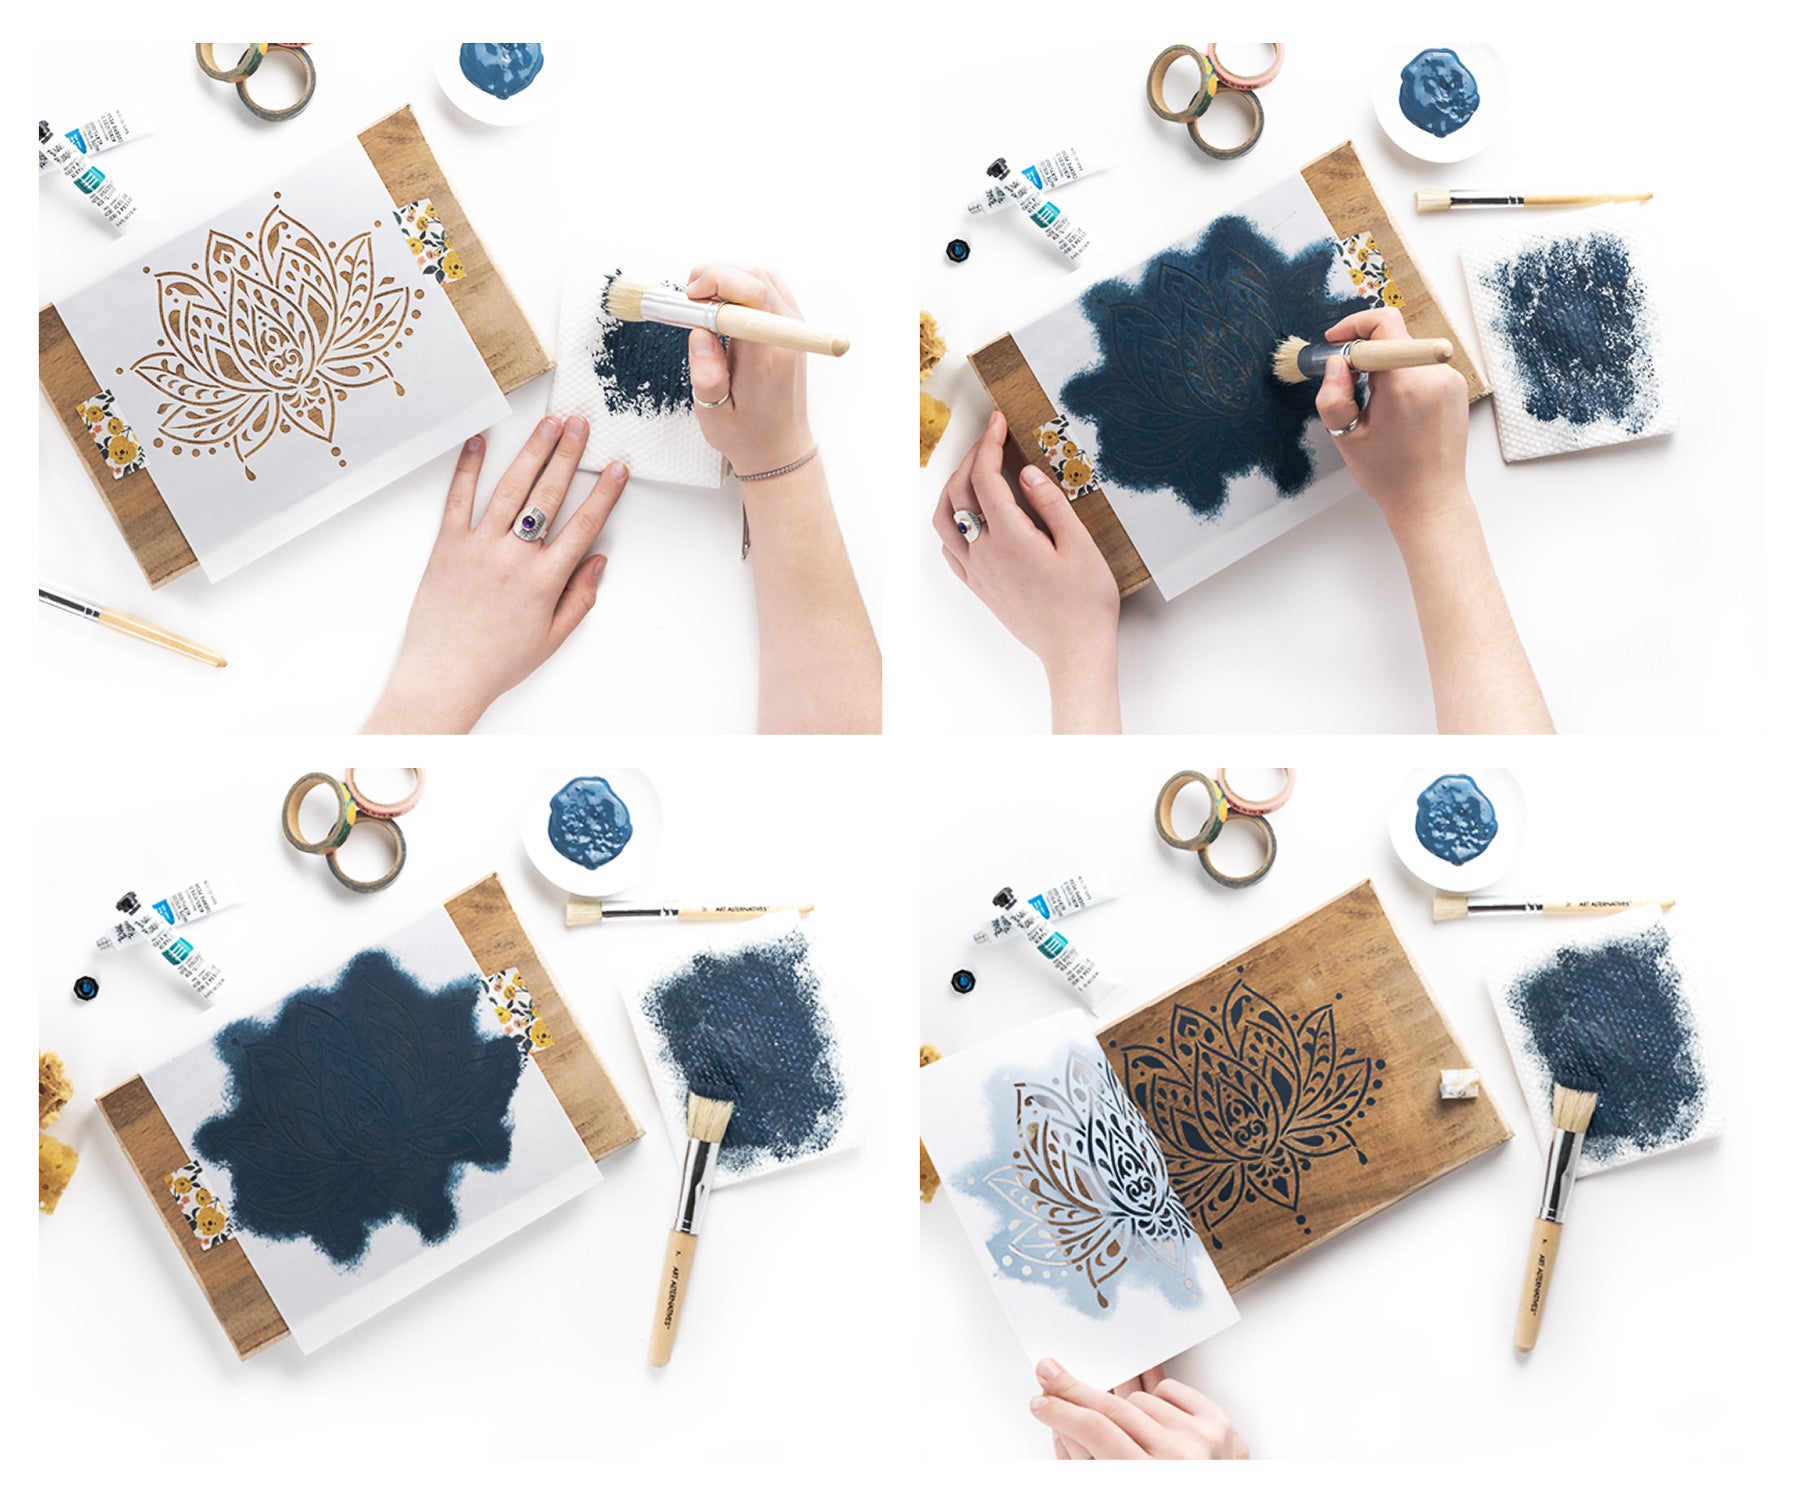
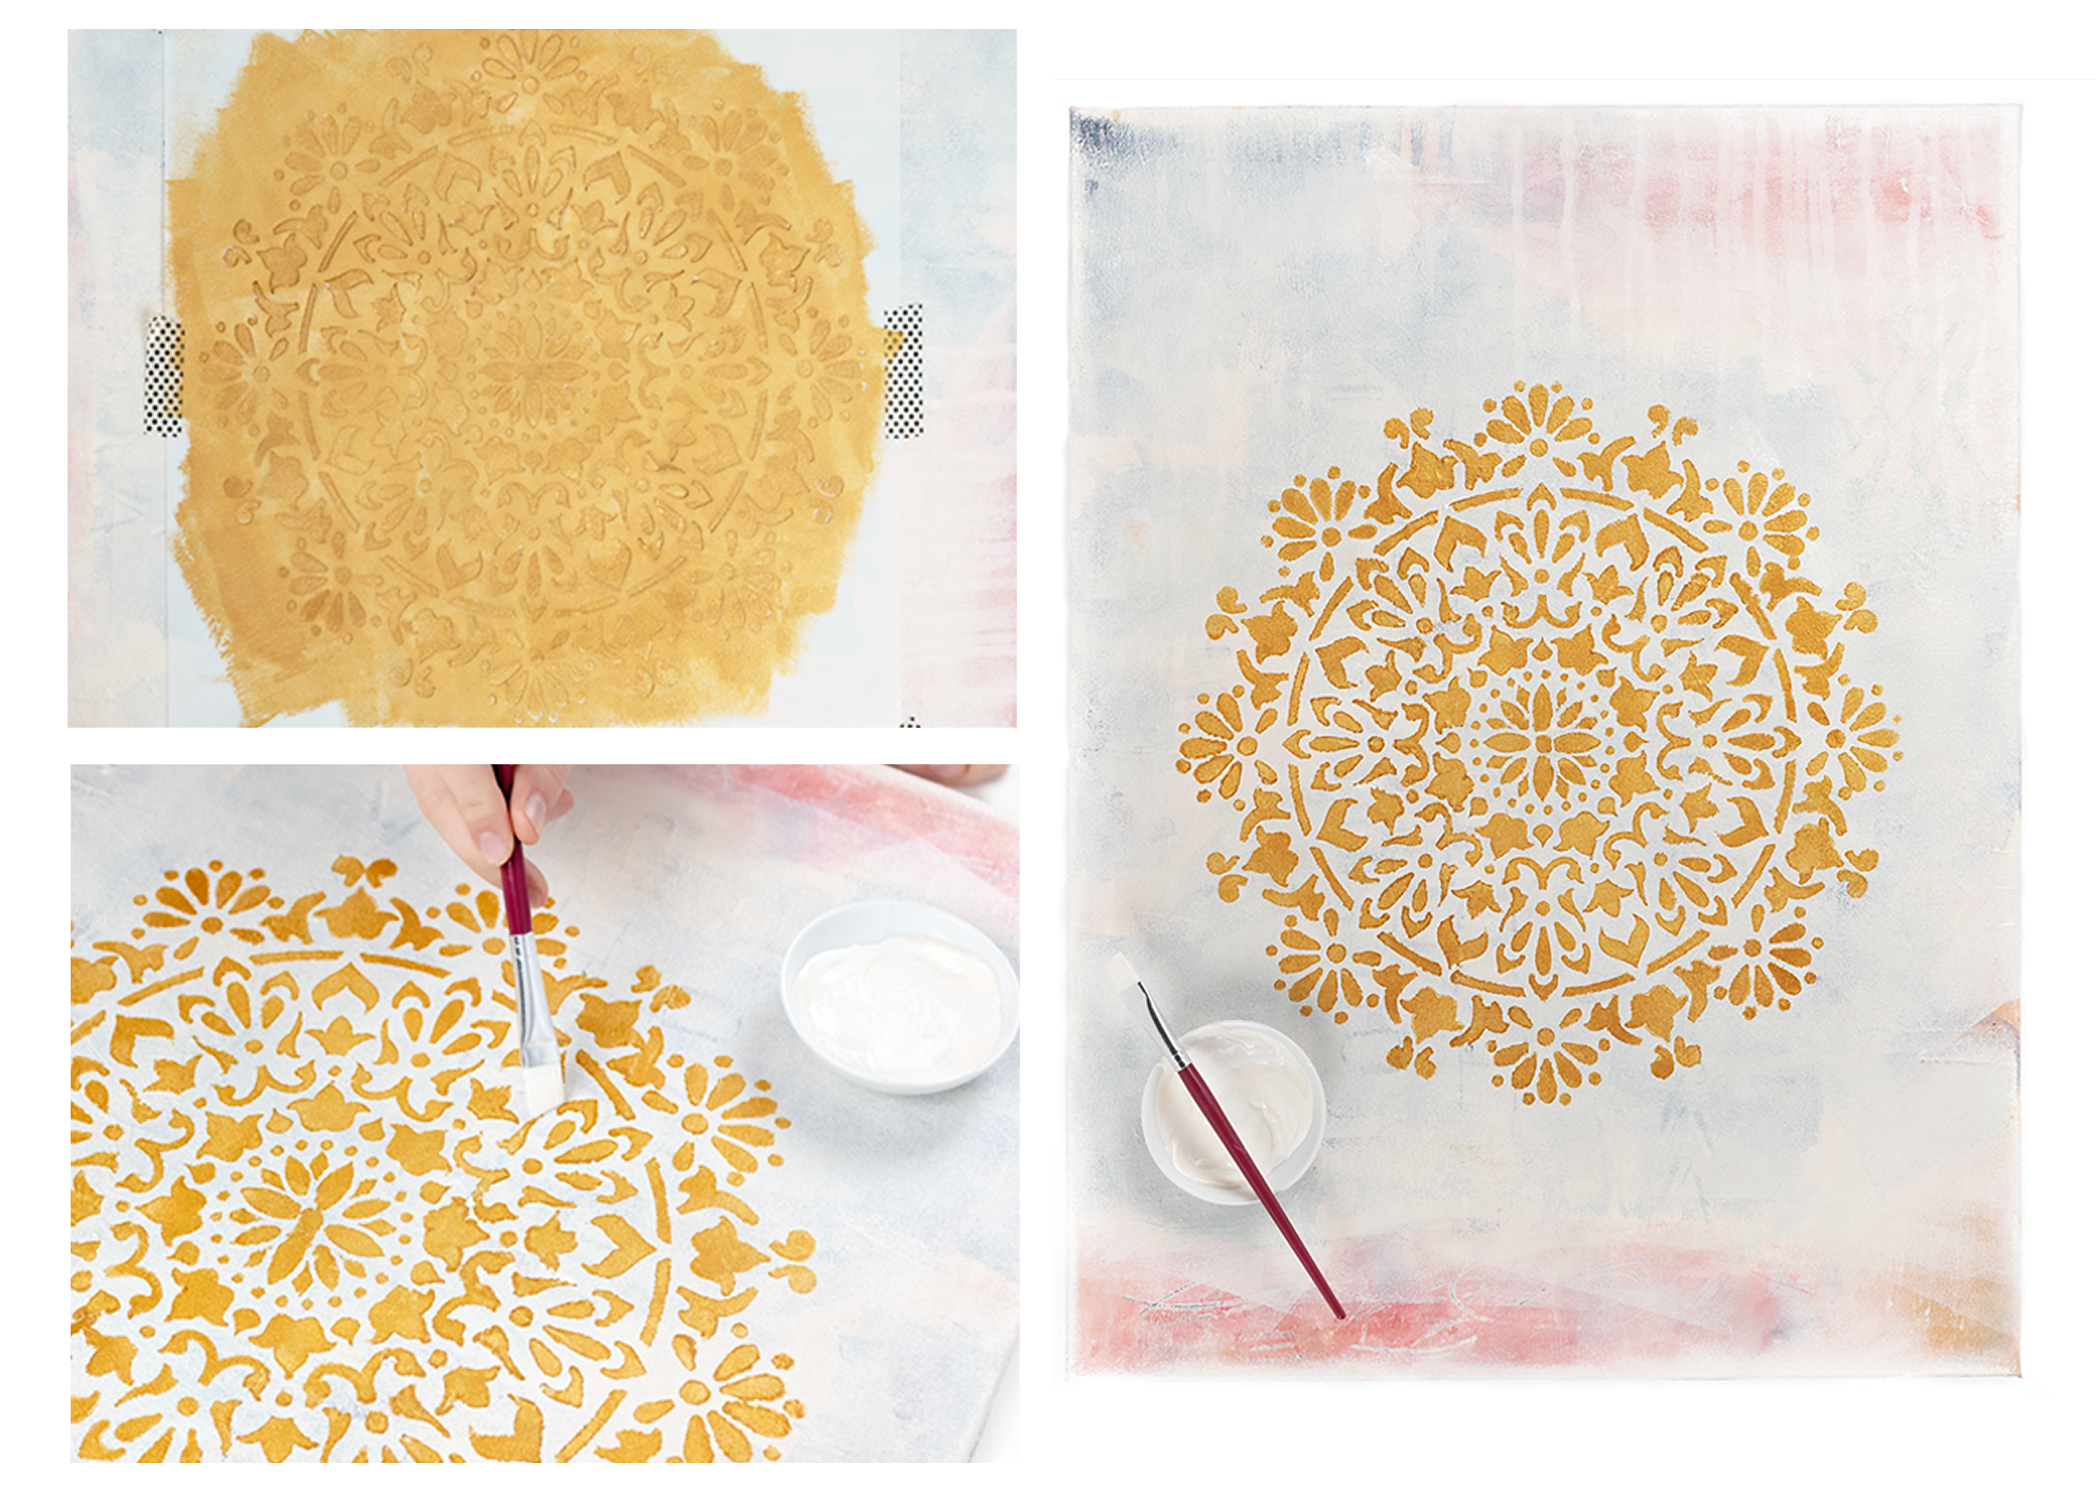
Tip 2: Offload and work in layers
If there were a golden rule for how to stencil, this would be it - offload the paint. Every dip in the paint. Every time.
Offloading means removing the excess paint from the applicator onto a paper towel or rag. The brush should be nearly dry to the touch. A little paint goes a long manner.
This method is called dry brushing.
The trick is to use a dry out brush (or roller) and work in layers. Slowly building up the color will result is a clean and professional finish.
*Tools: stipple castor, dabber, sponge, or roller.
Tip iii: Tap tap tap that paint
Apply paint at the edges of the stencil and work towards the center with a light upward-and-downwards motion ( tap tap tap). Avoid using a side-to-side movement or pressing too firm; this will crusade bleed.
Naturally, if you are using a foam roller, you won't use an up-and-down motion. Merely you still want to start from the edges of the stencil and work towards the heart.
*Tools: stipple castor, dabber, sponge.
Tip four: Patience
The terminate is exciting. Y'all want to peek and see, but trust me, don't. Look a few minutes for the paint to dry, then elevator the stencil. Moisture paint around the border of the stencil tin bleed or drip when lifting the stencil off the surface. It's worth the extra few seconds to be patient.
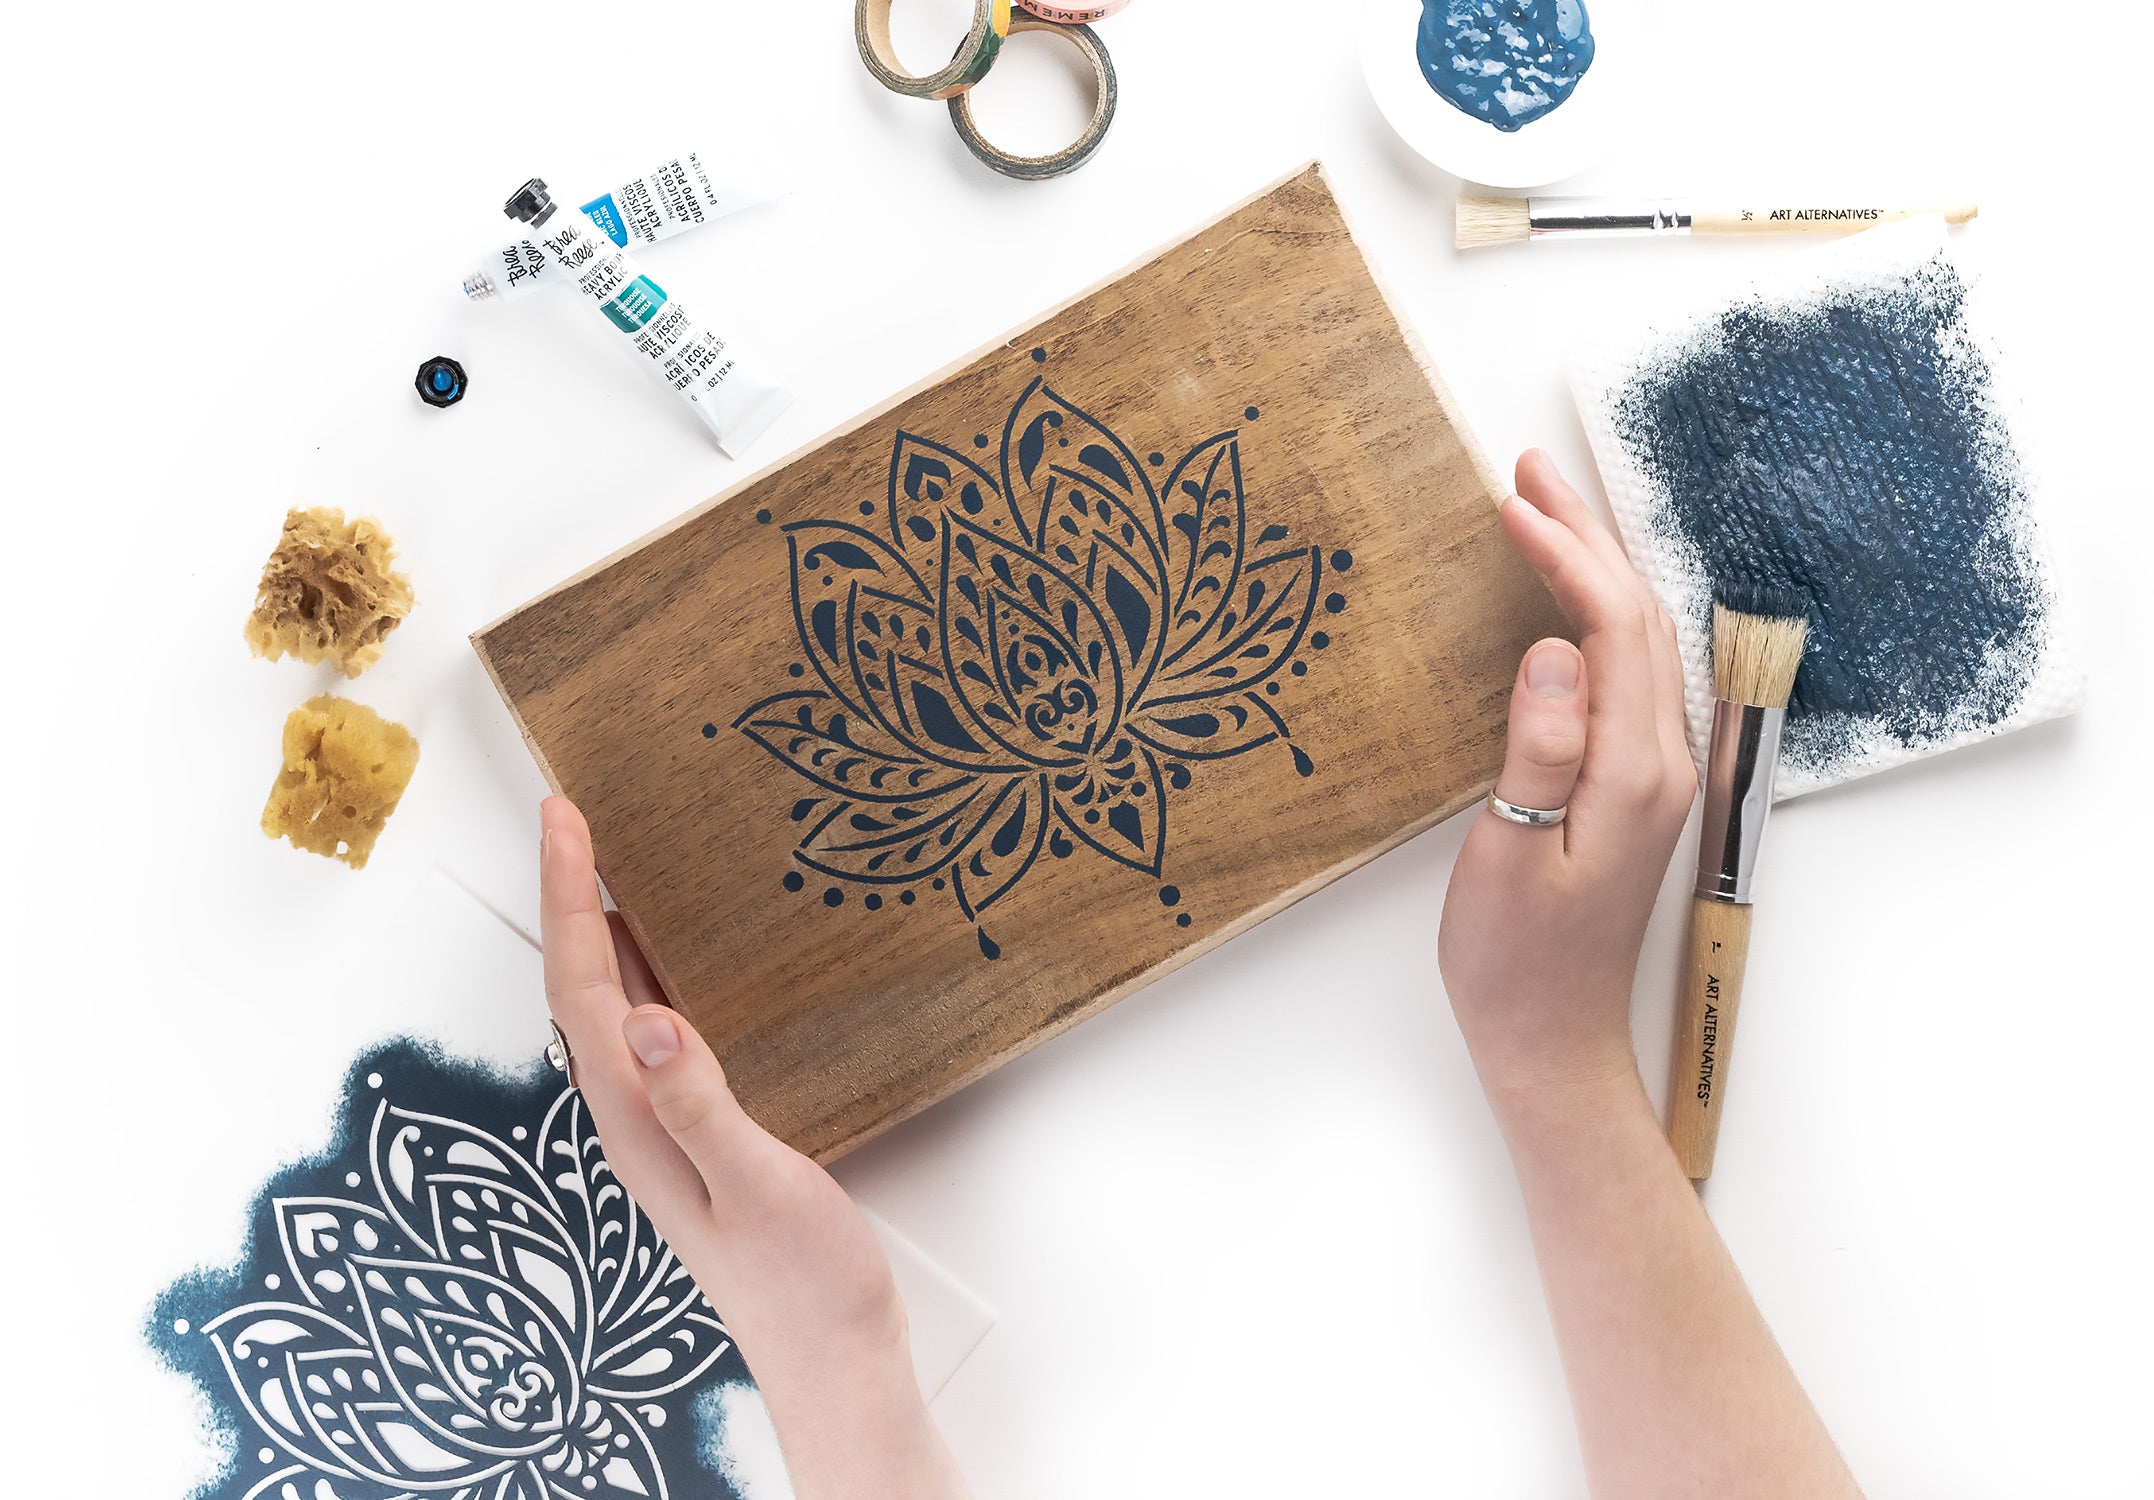
Touch up
Ok, so you lot're finished, and you lift the stencil, and everything is perfect except one (or two spots).
Blergh!
Don't sweat it! It'southward fixable.
Grab a small paintbrush and give information technology a light impact up with the base colour. No one will notice!
Stencil Tip - Mend those bridges
Bridges are the connectors (tabs) that concur the stencil together and give it strength. Without bridges, the graphic would be one big outline with no item.
Some people like the bridged wait and others don't. It'south really up to you lot. Lettering or sayings sometimes read easier without the bridges.
After you have finished painting the stencil, grab a castor and fill in the gaps ( bridges), and Voila!

Caring for your stencil
It'southward important to make clean and shop your stencil correctly and then that it tin be reused across multiple projects, and provide a well-baked line with each use. We've created a guide to cleaning and caring for your stencils.
Comments
John Gonsalves - January 22, 2022All-time tutortorial I accept read for someone who has never stenciled before.
I hope yous could requite me a proffer on the paint,creme etc. on my
restoration project.I have an M37 Weapons Carrier truck same series truck
my unit of measurement used in vietnam . I desire to utilise my unit and sectionalization on the steel
bumpers front and rear in a apartment white. But not sure what paint, creme etc to
employ.The truck has been repainted in it's original Olive Drab but semi gloss.
Any help volition be greatly appreciated !
jennie ferrone - Jan 22, 2022i would similar to wearing apparel upwardly my bulldoze way do you lot have any ideals what i can do
Debi Downs - December 29, 2021So perfect to understand….thanks.
Debi Downs - December 29, 2021So perfect to understand….cheers.
James Hallahan - December 29, 2021I watched a you tube video and this women said your first coat of pigment when your stencil is in place, is the background colour, this seals edges effectually stencil, preventing bleeds
Gracie Jane Lowe - November 29, 2021I desire to stencil house numbers on back of wood bench. Don't want white but do want to see at night.
Penny - November 29, 2021Could you lot perhaps offer a small booklet with your great ideas for your customers? I would gladly pay for your advice! Thanks
Milton Prestes - November 29, 2021can you brand a stencil in a metal sheet to exist used over the wood with a burn torch ?
Bruce Wollak - Baronial 29, 2021Tin can you give me some tips on stenciling a wall?
Billy Mulkey - July 20, 2021use modernistic poude to seal your stencil before painting ,allow dry out first
Source: https://www.stencilrevolution.com/blogs/tutorials/how-to-stencil
0 Response to "What Kind of Stencils Are Used for Spray Paint Art"
Post a Comment